Api53 Setup Guide
Welcome to Api53 Setup Guide
This guide will show you how to get started with a new setup for Api53. We will walk you through all the necessary steps in this guide. The entire setup takes no longer than four minutes.
Please note that only the following e-commerce platforms are currently supported:
- Magento 2
Of course, we will add more platforms over time. To be informed immediately, please subscribe to our newsletter.
Setup Guide
Please go through all points to successfully connect to our SaaS solution.
1. Create your first Shop
After successfully log in to Api53, please open your Dashboard page.
On the right side, you will find a menu, Click on "Shop" page.
Click on "Add Shop" then fill out the form with your shop URL address and shop types - e.g.: Magento 2.
After successfully adding your shop to Api53, you will be able to view it in the shop list. From there, you can also take your API Key for our app or extension. The API Key is very important because you need it to authenticate your e-commerce platform with our system.
2. Connect your shop to Api53
To connect your shop to Api53 you have to install our app or extension. Please follow these instructions for your e-commerce platform:
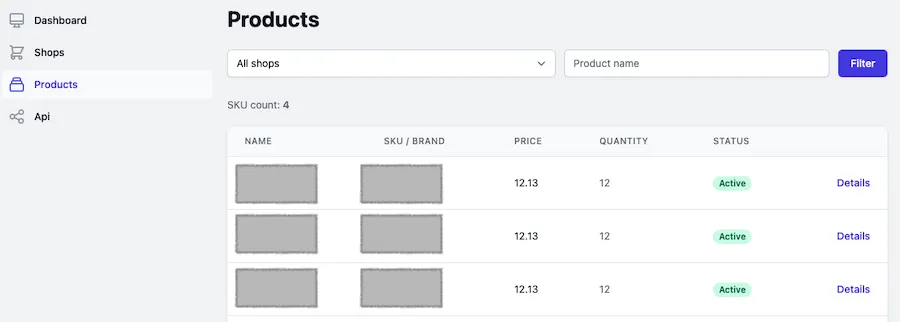
After connecting to Api53 successfully, you will be able to see your products on the Products page.

3. Create your first API Endpoint
In order for your partners to be able to access our system, you need to create an API endpoint. With our SaaS solution you can control the API endpoint as you like through user administration and API rules.

Please Note:
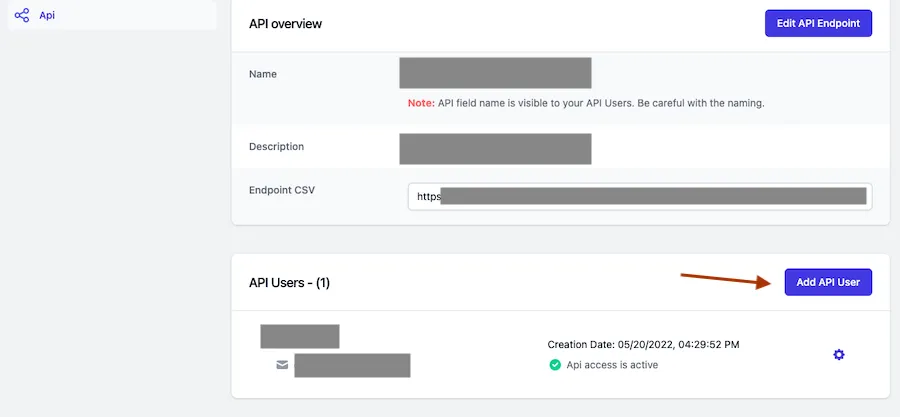
"Api endpoint name" is visible to your end customers. End customers are the customers who you authorize for your API through our platform - your users. The API endpoint name will also be emailed to your API users when you add them.
"Api endpoint description" is not visible to your API users. This field serves as an internal (secret) description for you.
4. Create your first API user
After successfully adding your first API Endpoint, you can start authorizing your partners on your prodocut API.
To do so, go to "Api" in the right menu, click the API Endpoint you added in step 3.

When creating your first API user you will be asked for their name and email address. The email address is important because when you add an API user you can automatically send the API credentials to them. This fully automates the process and you don't have to do anything manually.
The email to your API user includes API endpoint credentials, Secret API Key, API Endpoint URL and link to our API documentation.
Notice
We and selected third parties use cookies or similar technologies for technical purposes and, with your consent, for other purposes (“basic interactions & functionalities” and “measurement”) as specified in the cookie policy. You can freely give, deny, or withdraw your consent at any time.
You can read more about our Priavacy Policy and Coookie Policy here: Privacy Policy